How to enroll with sbtpg
Instructions for TaxWise Customers
Step 1
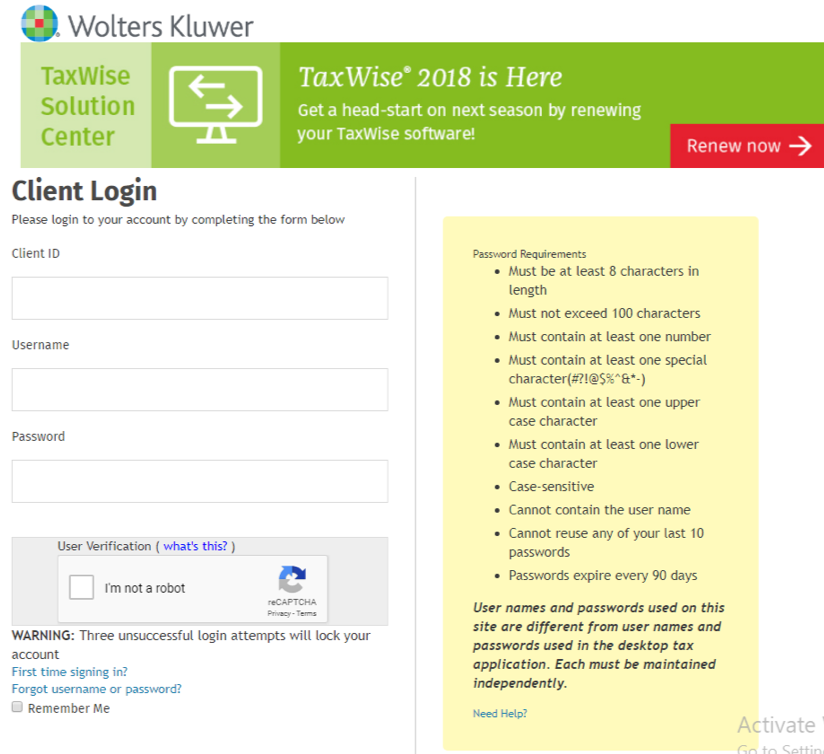
Logon to the TaxWise support site.

Step 2
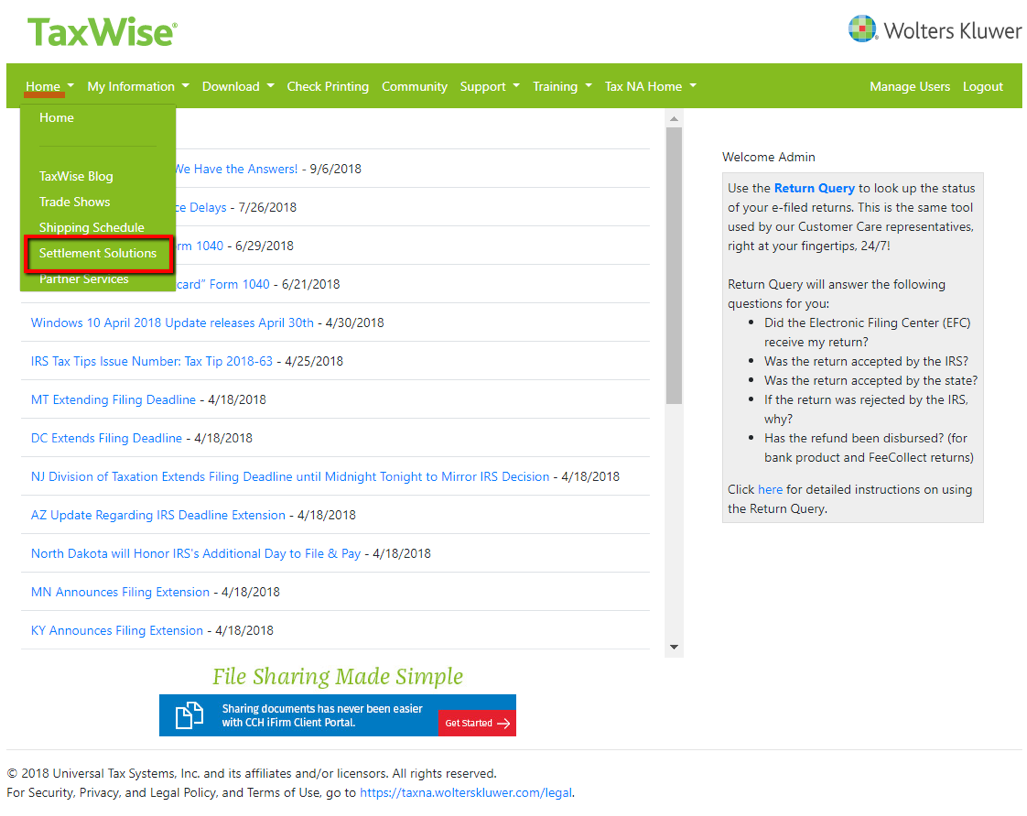
Select Settlement Solutions.
Step 3
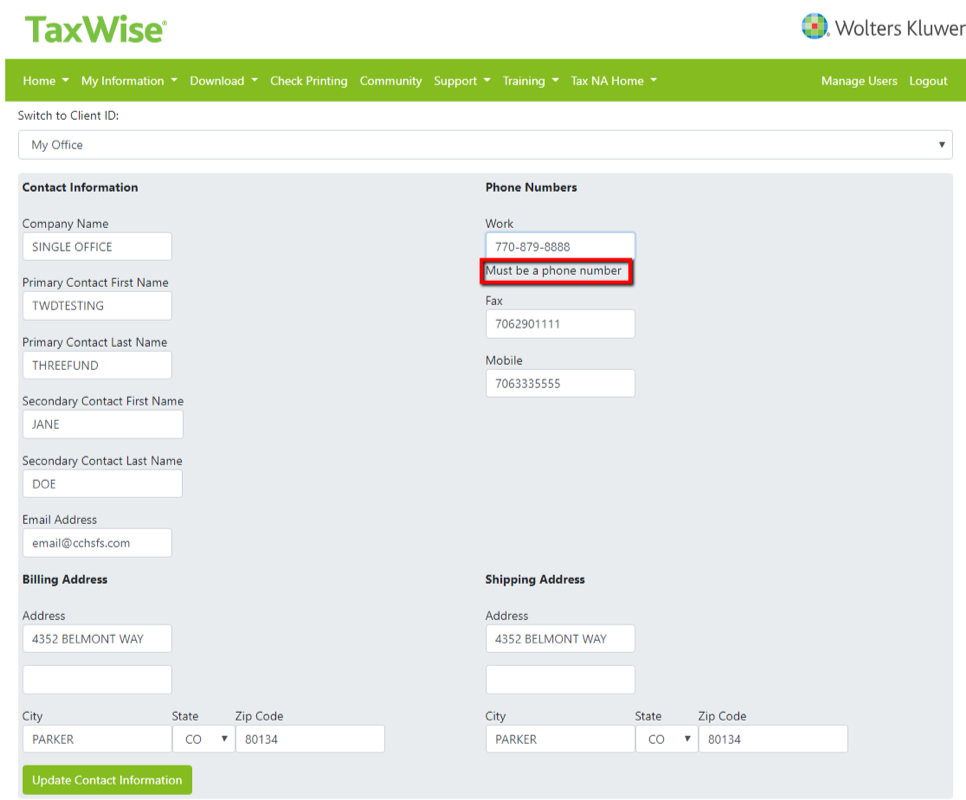
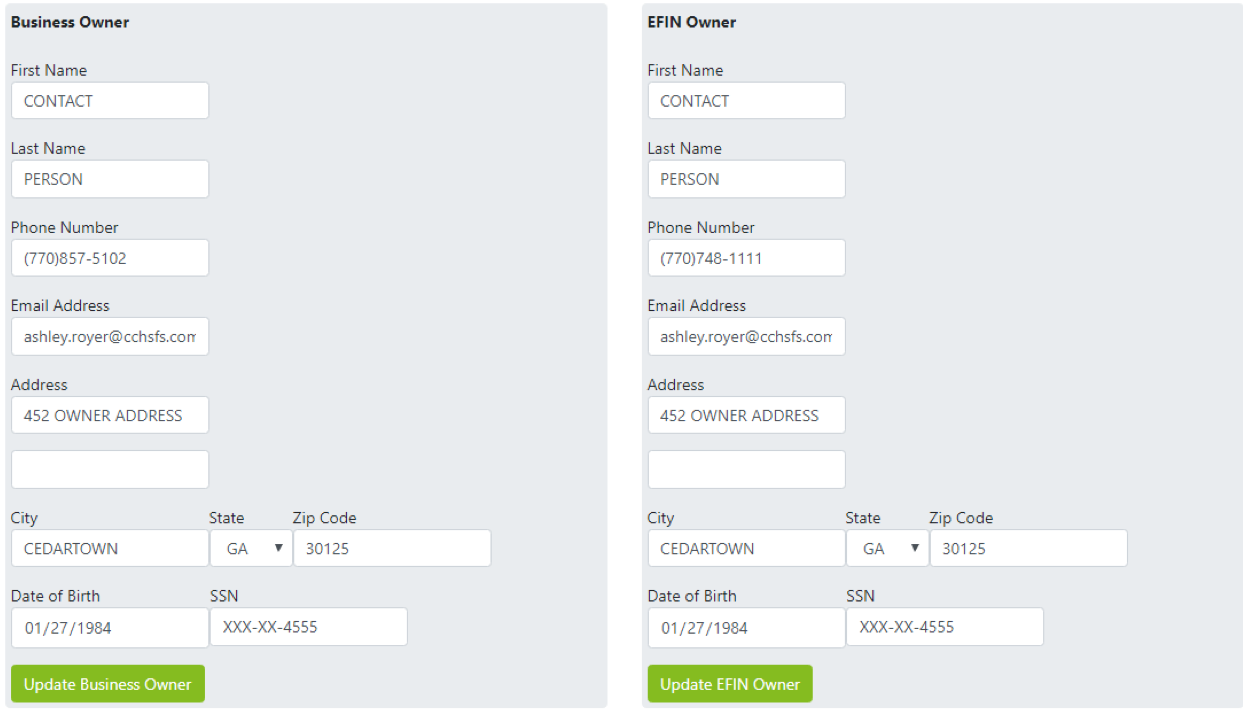
Confirm that your information is correct as the information you provide will be sent to us in the enrollment record. There are three sections. Edit and update one section at a time, clicking the Update buttons to save each section.
Step 4
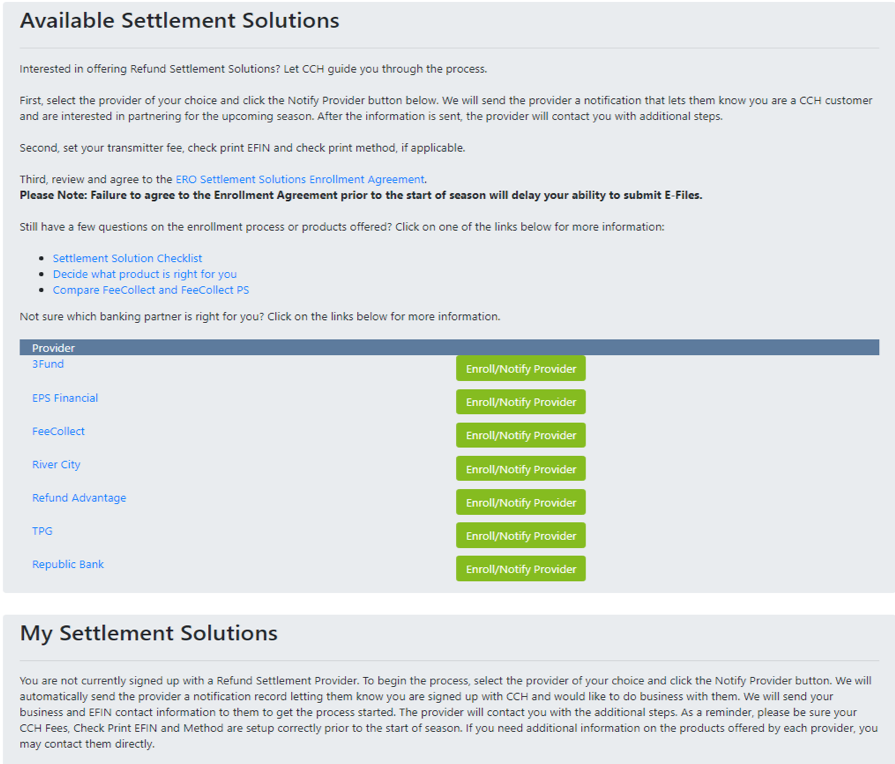
Click the blue text for additional information including enrollment agreement, checklists, comparison chart and links to additional information.
Submit request to enroll with sbtpg by clicking Enroll/Notify Provider button next to sbtpg.
Please note that free marketing materials from sbtpg are only available with the sbtpg Standard Refund Transfer program.
Step 5
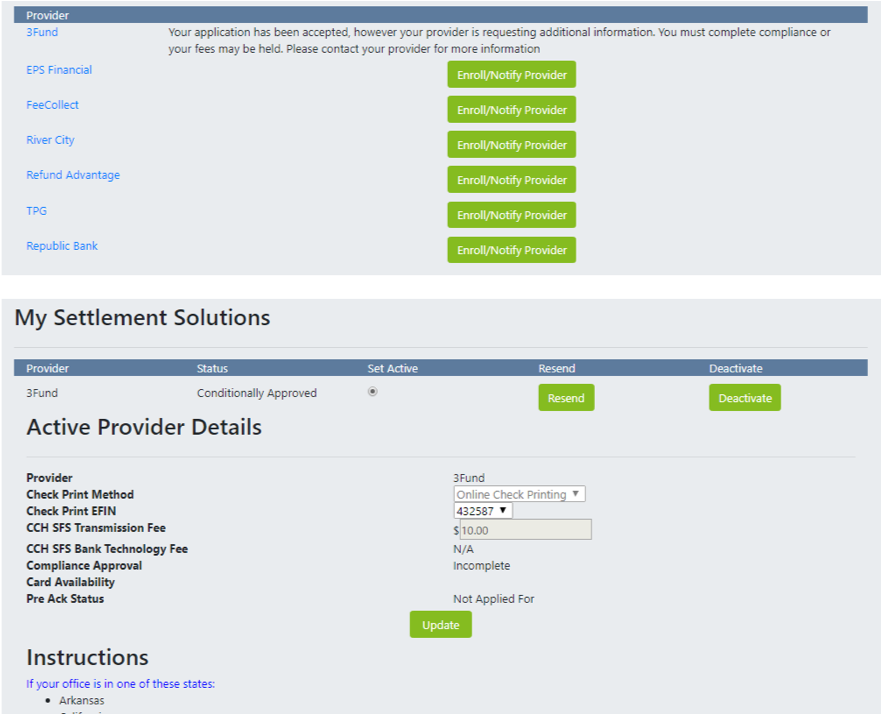
Once you have enrolled you will see the status of your enrollment including details about the program you have enrolled in.
Step 6
We will notify you upon approval. You can also logon to our website to check your enrollment status.
Once approved, you'll need to complete the sbtpg compliance training and verify your information.
Note for Service Bureaus
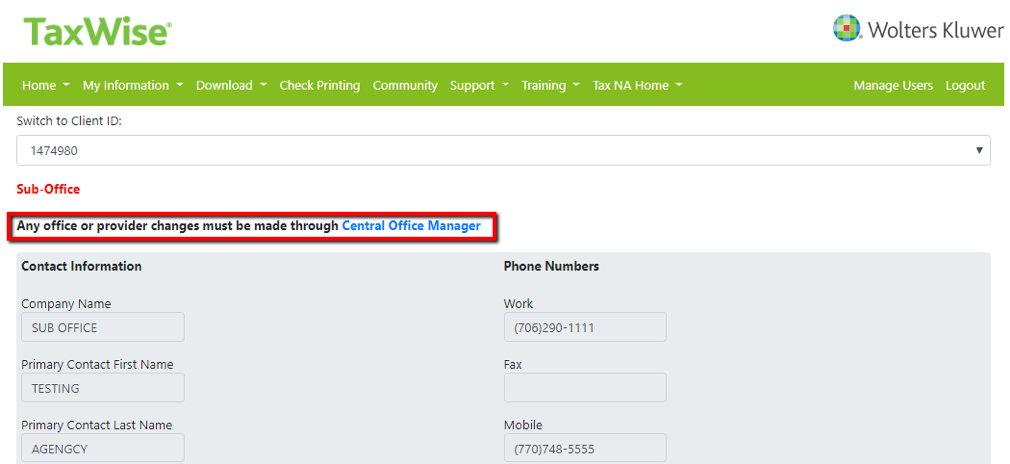
If you are a service bureau use the "Switch to Client ID" drop down box to view and edit sub office information and submit enrollment records for sub offices. Service bureaus must login to Central Office Manger (COM) to edit any office information or Settlement Solution providers. See details below.
Logon to the Central Office Manager (COM).

Each office is displayed under the Offices tab. Select an Office Name to view information for that office.
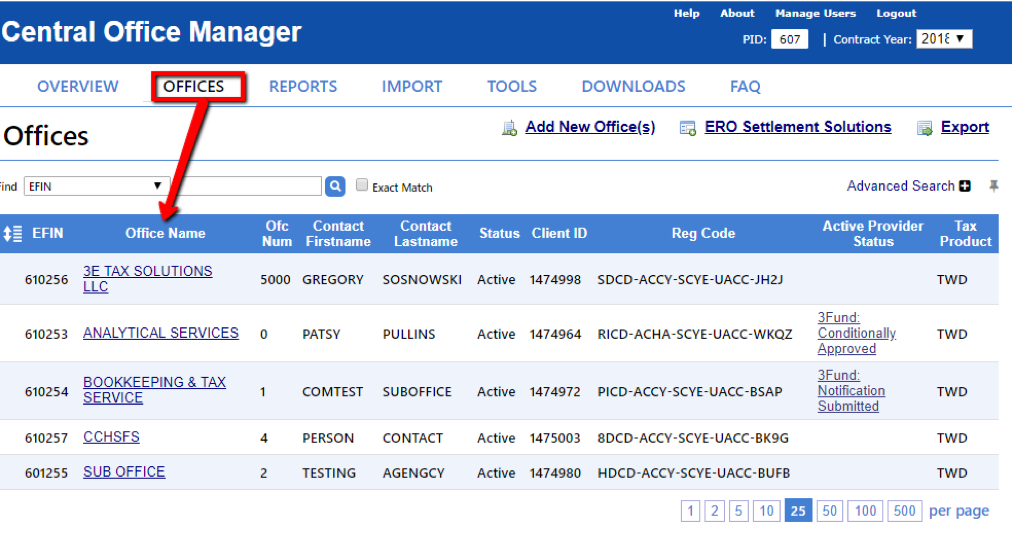
Click "Edit Office Info" to begin editing office information.
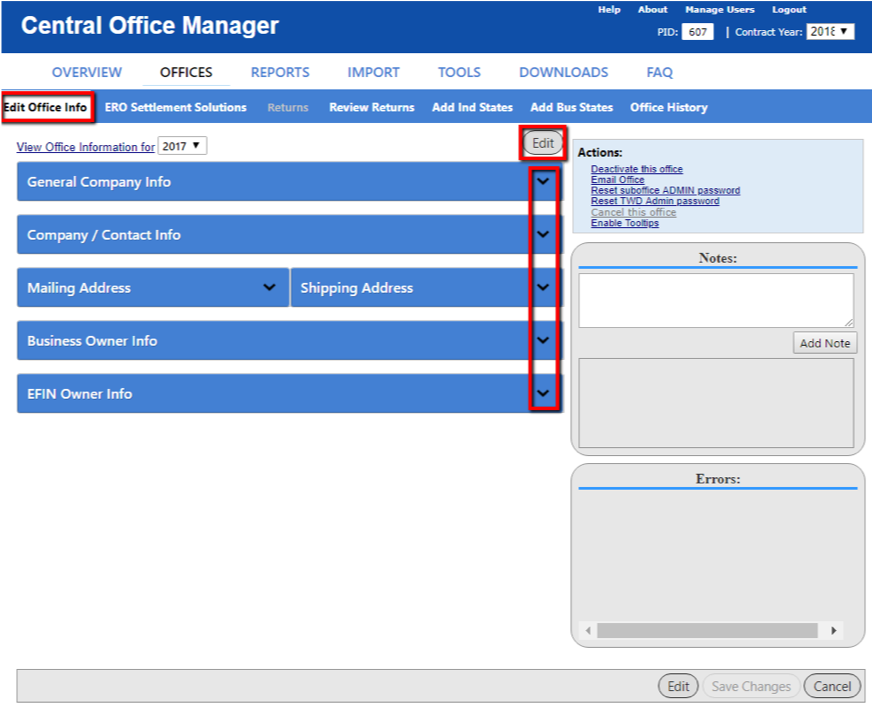
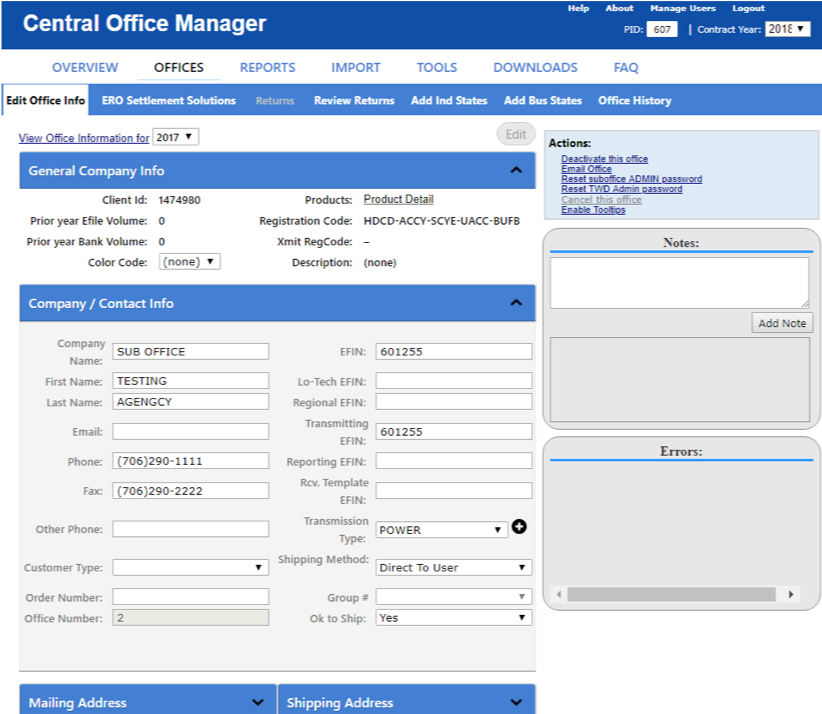
Provide information for all required fields.

Provide company and contact information.
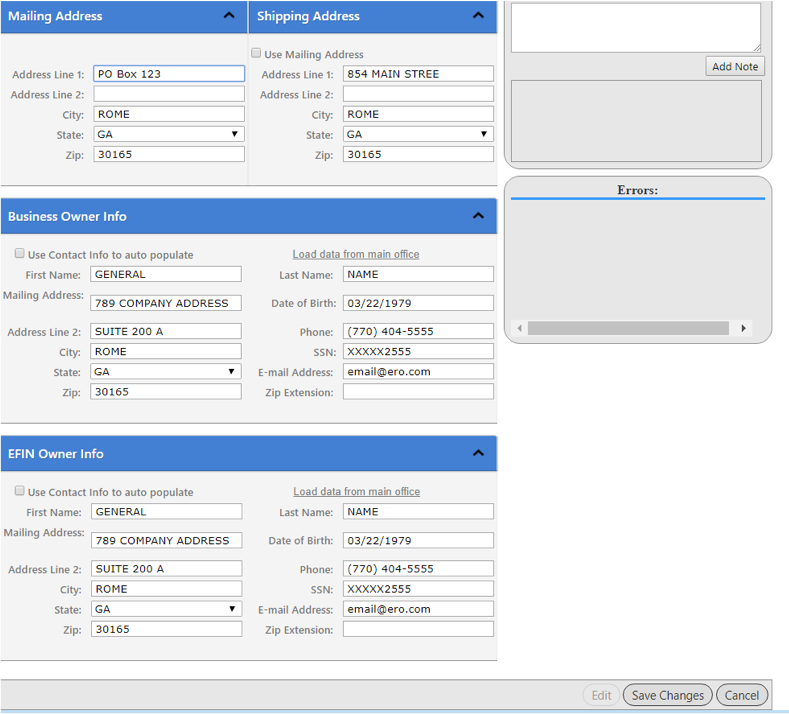
Provide address, business and EFIN owner information.
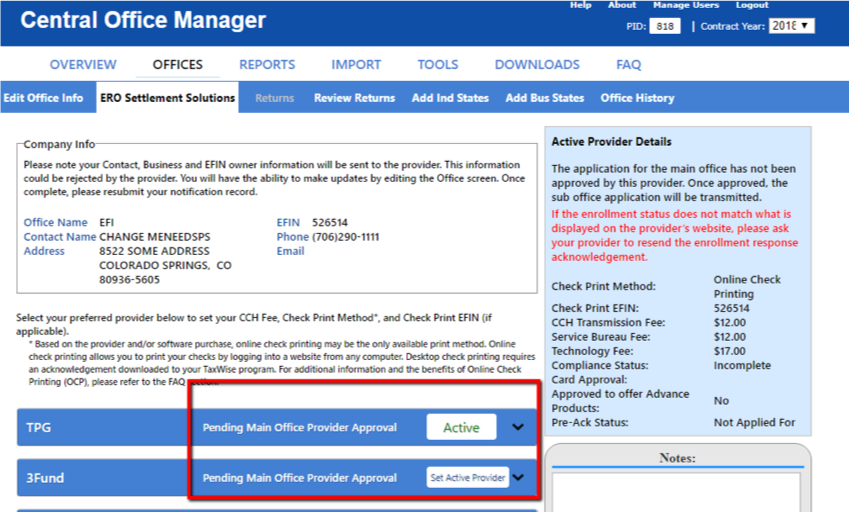
Select ERO settlement solutions provider by following the steps below.
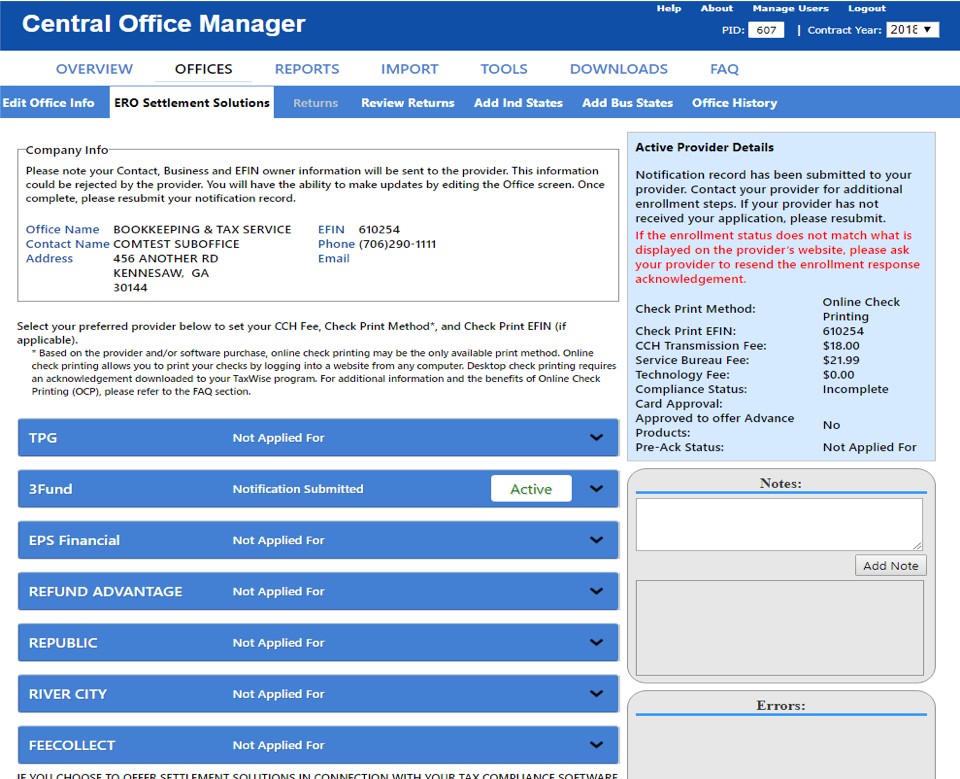
Select a provider, edit information as needed and submit.
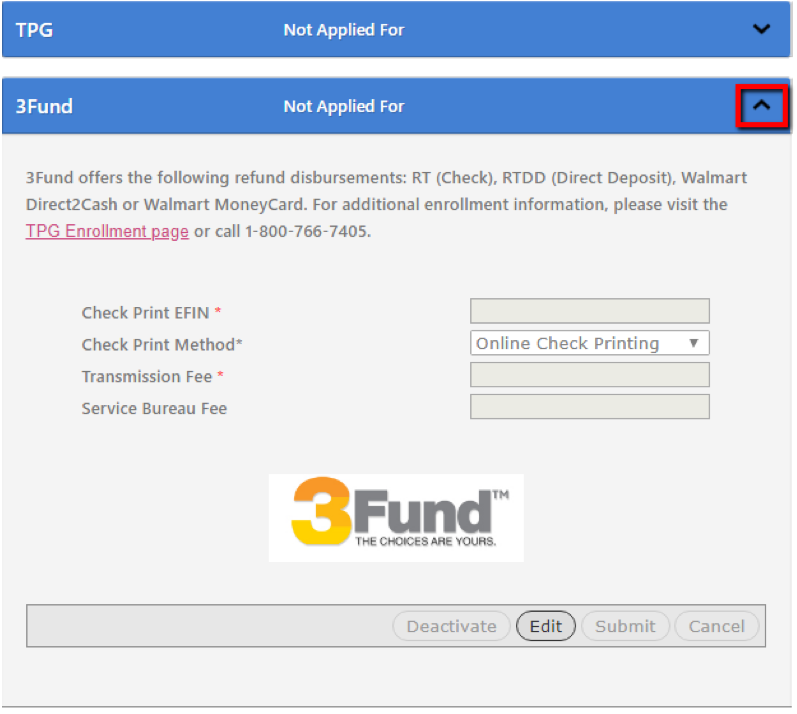
The information from Edit Office Info will be sent in the enrollment record. There are validations in place for required fields and specific entry types.
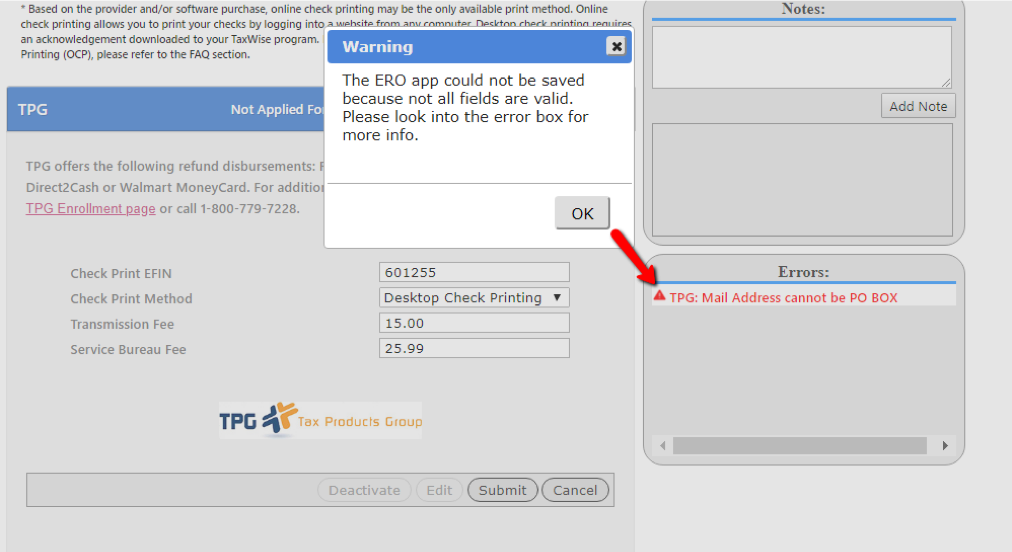
If you have several sub offices that need enrollment records sent, then you can use the settlement solution template.
The templates are located on the Downloads tab under Documents.
Once the template has been complete, use the Import tab to submit several enrollment records at once.
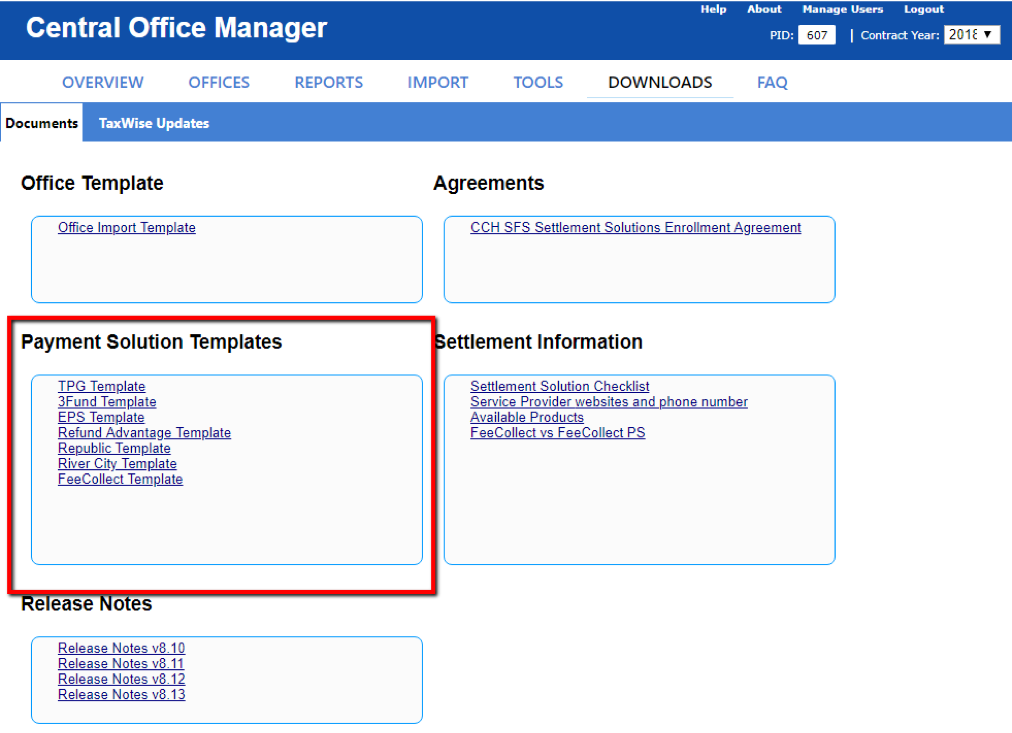
To submit several enrollment records at once, use the Payment Solution Template. The spreadsheet will have tool tips in yellow for each column. After you have entered all office information save the template.
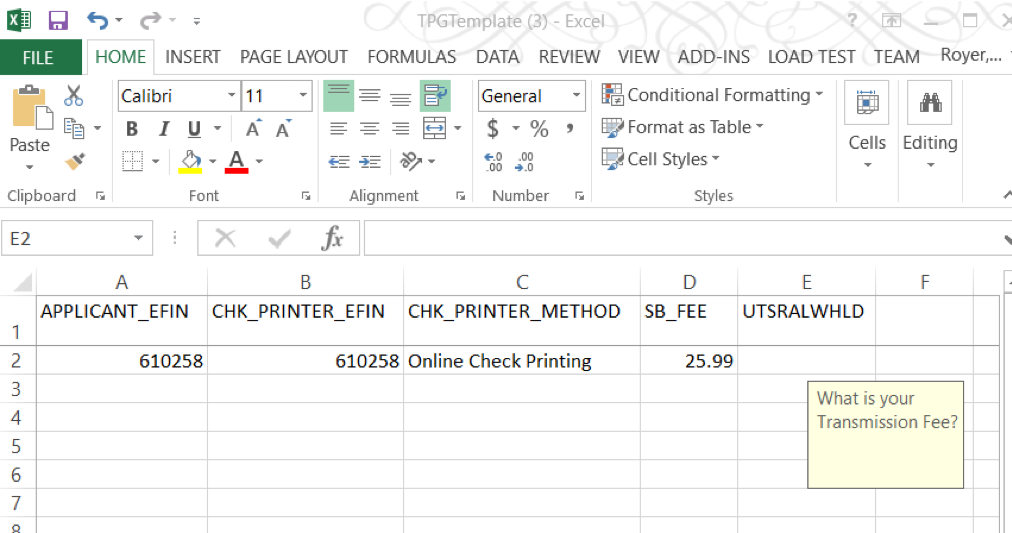
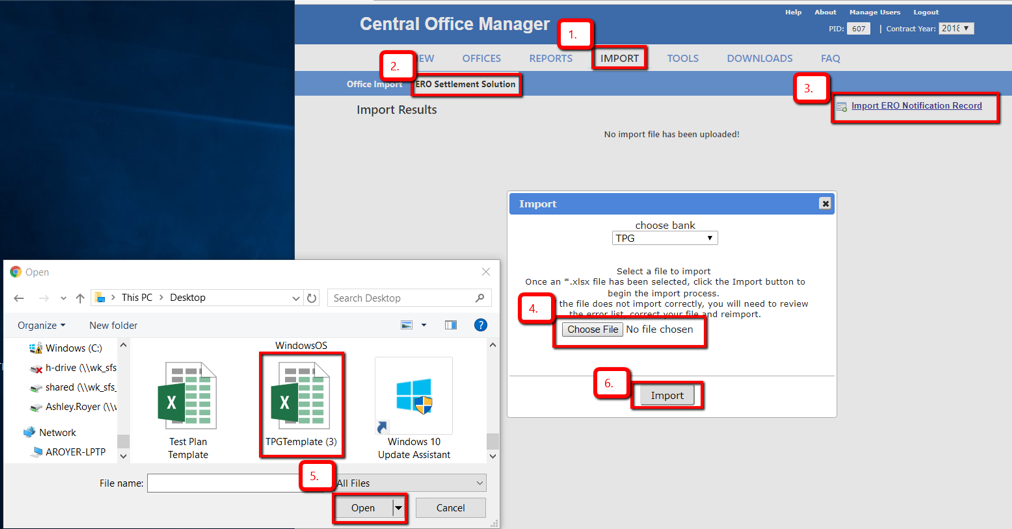
Follow these steps to import ERO Notification Record
See screenshot below for reference
- Import tab
- ERO Settlement Solution tab
- Import ERO Notification Record
- Choose the file
- Browse and Open the file
- Import
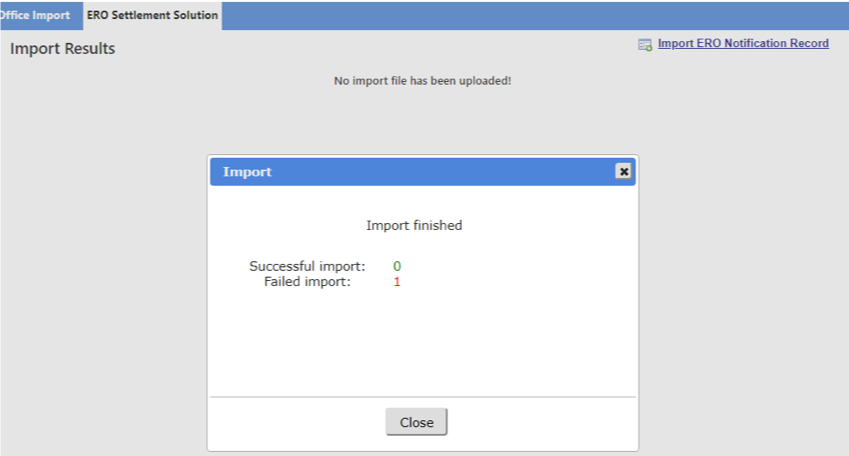
You will receive a confirmation noting how many imports were successful or unsuccessful.
If there are errors during the import, select the red exclamation point to view each error. Once errors have been resolved you may import the updated spreadsheet. After a successful import, you may be the Overview or Offices tab for enrollment record statuses.
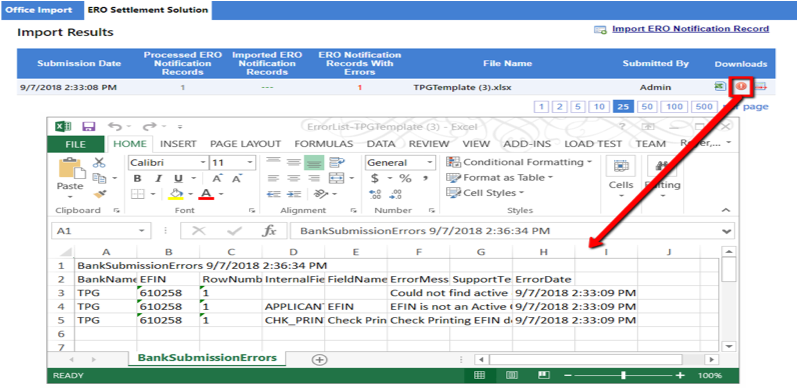
Import results are displayed under the ERO Settlement Solutions tab.

View submitted enrollment records.
